Composer is great tool that has been around for few years now and there are still millions of people who don't know what it's used for and why it should be used. In fact, composer has made its impact to the extend that it has been a full part of modern PHP application development life-cycle. Any serious PHP developer could not do away from using composer.
If you belong to the category of those who don't know what it's used for and how to use it, or you're aware of it but you haven't taken some time to give it a try, here is an occasion for you to see it in action.
What is composer?
Composer is a PHP development tool that's used to help developers share and/or use source codes of other developers. A developer working on a project A may need a source code or part of it in another project B, either from a different developer or from the same developer.
Imagine you are creating a calculator, you will probably need functions for addition, multiplication, division, etc. But those functions might have already been created by another developer or you've created them in one of your old projects. Why not use those existing parts? Composer comes in to help you grab that code you need and combine it to your new project under going and reduce your stress. In this context a source code from another developer/project is called a package, dependency, or a library.
But, composer doesn't do it just like that. It will not just pick up a portion of code and combine it to any other code. There is some science behind how composer works. Before composer could grab a code as a dependency, this one must have been created as such and for that reason. Specifically, composer helps you manage packages/dependencies that your project depend on by looking them up, grabbing them to your project folder, and then makes sure to keep records of them for future need.
This is the reason why composer is called a dependency manager.
As such, composer does three main things for your project:
It manages your application's dependencies
You use a configuration file to declare your project dependencies then composer downloads them from a remote repository, keeps records of them and their required versions, and can at any time update them for you. This is basically explained as following:
Suppose:
- You have a project that depends on a number of libraries.
- Some of those libraries depend on other libraries.
Composer:
- Enables you to declare the libraries you depend on.
- Finds out which versions of which packages can and need to be installed, and installs them (meaning it downloads them into your project).
Example taken from composer documentation page
Classes autoloading
One of the greates features of modern PHP developemnt is autoloading of classes. Composer as a dependency manager, allows you to handle the autoloading of those dependencies conventionally to psr-0, and psr-4 autoloading community standards. When you enable composer autoloader in your project, all your classes become available everywhere in your files, reducing too much calls of require() or include().
Works hand in hand with packagist.org
One thing you may be wondering is where are those dependencies from? The composer project works hands a website name [packagist.org]() created by Jordi Boggiano and Igor Wiedler which is used by millions of developers worldwide to store their packages also known as PHP components. You can use packagist to look for others' packages or host your own packages.
How to use composer?
Now that you have an idea of what composer is, let's see how we can use it.
Installation
- On Windows
To install composer on windows you need to download the executable file and run it. Make sure you have your PHP already installed because composer will ask you the path to your PHP installation. Also close all opened command consoles to allow composer to get your PATH, and you should be good to go.
- On Linux and OSX
Let's see how to install composer globally. This means your composer command will be available in all locations of your computer so that you don't have to be installing it many times.
Open up a terminal and run the following command:
curl -sS https://getcomposer.org/installer | phpFigure 1. curl command to download composer installer
This will create a php archive file named composer.phar in the loaction from which you executed the previous command. From here you can use composer by running:
php composer.pharFigure 2. run composer
Let make it glogal and add it to the PATH so that you will just have to type composer.
Move the composer.phar to your binary folder
sudo mv composer.phar /usr/local/bin/composerFigure 3. copy composer.phar to bin folder
Then make it executable by running:
sudo chmod +x /usr/local/bin/composerFigure 4. Make composer executable
Now open up your ~/.bash_profile file and check at the end if this line is there: PATH=/usr/local/bin:$PATH. If not just append it there.
From now you can run just composer.
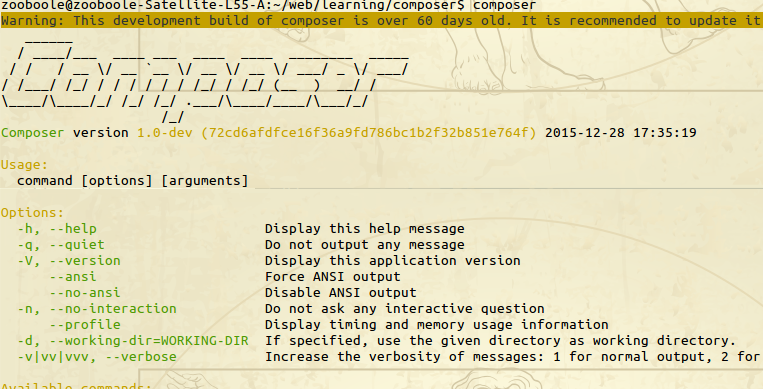 Figure 5. Composer command line console
If you encounter any problem, do note hesitate to refer to the composer official installation page
First project
Now that you have composer installed, let see how it can be used. Before we go further, create a new project folder under your web root and name it composerIntro or any name you prefer. Within that folder create an index.php file. Beside the index file create a new file named composer.json.
We'll make use of that composer.json file to give instructions to composer on what dependencies we'll need for our project. Remember what we said of composer functionalities. First let's think of which package we need to grab into our project. in our case now I would like us to use the famous monolog logging package.
What this package does is to allow us to write messages into a text file in our web root or anywhere else. The use is for example when your application is running and you don't want your users to see any occuring errors, you can rather put them into a file so that you'll be able to check it and fix them. This is called logging. But monolog does it in a professional way. You can decide to send the logs to an email or to many other channels. Beside that, you can categorize the log message by their level of severity like, information, debug, warning, etc.
In this project we will get that package from packagist and try to log some sample messages. To start, open up you composer.json file with your favorite text editor and enter this:
{
    "require":{
        "monolog/monolog": "^1.13"
    }
}
Figure 6. Composer.json file
This tells composer to go to packagist.org and grab the monolog package, a minumum version of 1.13. Read more about the packages naming here and about the versions here. Basically the package name is a set of vendor/projectname. This helps avoid naming conflicts.
Now open up your command console and move to your composerIntro project folder by using cd. From then run the following command:
composer installFigure 7-1. Command to install composer packages
if you could not make it globalor you clould not make it executable during the installation, you might have to use:
php composer.phar installFigure 7-2. Composer command line console
AFter running this command check in your project folder. A new folder named **vendor** should have been created. Plus another file named composer.lock. This is a lucky day :). Now whem you open the vendor folder you should see another folder named monolog. That's our package we asked. You might also notice that composer has created another folder in there named composer and another file named autoload.php. Those are the ones composer uses to make the autoloading we were talking about ealier.
Autoloading
We have grabbed the package we wanted in our project. Now let's ask composer to make all classes available in the vendor folder and its sub-folders available for us. Open the index,php file and enter the following code:
<?php

require __DIR__ . '/vendor/autoload.php';
Figure 8. requiring composer autoloader
Note: we're requiring the
autoload.phpfile we just saw in thevendorfolder.
Once that done, all classes are now accessible. let see that. Here we want to make use of monolog, and probably you've never used it and don't know how to do that. No problem. Open up the vendor/monolog/monolog/README.mdown file it containes all the instructions on how you can make use of it.
Based on that, let add the following code to our index file:
$logger = new MonologLogger('composer');
$logger->pushHandler(new MonologHandlerStreamHandler('sample-log.log'));

$logger->addRecord(MonologLogger::INFO, 'Application first log');
Figure 9. Monolog configuration
The index.php file should look like this now:
<?php

require __DIR__ . '/vendor/autoload.php';

$logger = new MonologLogger('composer');
$logger->pushHandler(new MonologHandlerStreamHandler('sample-log.log'));

$logger->addRecord(MonologLogger::INFO, 'Application first log');
Figure 10. composer autoload and use of monolog package
Now run the project through php built-in server php -S 0.0.0.0:8888 or by using your web server like wamp. You should only see a blank page, but when you look inside the project folder you should see a new file named sample-log.log containing this:
[2016-05-22 11:21:54] composer.INFO: Application first log [] []Figure 11. Content of a monolog log file
Here is the magic of monolog. But another important thing you should notice is that in our index.php file we did not do require /vendor/monolog/monolog/src/logger.php before we access the Logger class. This because composer has already done the job for us. That's why we're talking of **autoloading**.
Autoloading our custom classes
We saw how composer autoloaded all classes in the vendor folder. When developing a project we may be called to create our custom classes. But since those ones are not of composer packages type, they can't be logded in the vendor folder. In that case we can also give an instruction to composer to go and look for our classes in their folder and load them for us.
Let's do that by creating a new folder under our composerIntro folder and name it src or any other name you want. Within that folder, create a new file and name it Account.php. Now place the following code in the Account.php file:
<?php
namespace Clients;

/**
* Account
*/
class Account
{

    public function create($name)
    {
        return "Account {$name} created";
    }

}
Figure 12. Sample Account class
This is a simple class containing one method. The method returns just a sentence containing a name of a new account. This is just for illustration purposes. Practically it's not that useful.
Now let's give the instruction to composer to ask it to autoload this class too. Open the composer.json file and add this:
"autoload": {
    "psr-4": {
        "Clients": "src"
    }
},
Figure 13. composer custom autoload
This tells composer that, for the namespace Clients go inside the folder src and load all the classes. That way we could access our Account class by just typing Clients\Account().
Our final composer.json file will look like this:
{

    "autoload": {
        "psr-4": {
            "Clients": "src"
        }
    },
    "require": {

        "monolog/monolog": "^1.13",

     }

}
Figure 14. Final composer.json file
After doing that, use your command console at the root of the project and issue the following command:
composer dump-autoloadFigure 15. Dump composer autoload
This command is kind of reloading composer. It will make composer consider the new instruction we just give it.
To test if our class was loaded let's add some code to our index.php file:
// Composer has done the requiring for use already,
// we can just call the class with its namespace
$account = new ClientsAccount();
$createAccount = $account->create('012345678999');

// let's display the feedback
echo $createAccount.'<br>';

// or we can also log the feedback
$logger->addRecord(MonologLogger::INFO, $createAccount);
Figure 16. Testing custom composer autoloaded class
Our index.php file becomes:
require __DIR__ . '/vendor/autoload.php';

$logger = new MonologLogger('composer');
$logger->pushHandler(new MonologHandlerStreamHandler('sample-log.log'));

// $logger->addRecord(MonologLogger::INFO, 'Application first log');

// Composer has done the requiring for use already,
// we can just call the class with its namespace
$account = new ClientsAccount();
$createAccount = $account->create('012345678999');

// let's display the feedback
echo $createAccount;

// or we can also log the feedback
$logger->addRecord(MonologLogger::INFO, $createAccount);
Figure 17. Final index.php file
Give it a try and check out what it displays. Also, have a look at your sample-log.log file. That's the tip of the iceberg.
Conclusion
You just saw what composer is, how you can install it and most importantly how to use it. Composer combined with packagist have taken web development to the next level. Today they can help us make our work very easy and fast. There are countless PHP components out there that one could use to save a lot of time.
I hope this helps someone to start enjoying modern web development. Let your peers know about it too by sharing this. If you have any question do not hesitate, ask it by commenting under this tutorial. Thank you for reading.
Last updated 2024-01-11 UTC